My first hardware wallet setup did not go well. I opened the box at my kitchen table, skimmed the quick-start card, and rushed through initialization because I was impatient. I didn’t verify the firmware. I wrote my seed phrase in a notebook that was sitting on my desk — the same notebook I use for everything — and didn’t make a second copy. I funded it with a non-trivial amount that same evening.
Six months later I was setting up a second device and re-reading my process notes when I realized how many things I’d done wrong. Nothing bad had happened, but it easily could have. The poor seed backup, the unverified firmware, the casual setup environment — any one of those could have been a critical failure point.
This guide is what I wish I’d had the first time. I’ve set up hardware wallets multiple times since that first attempt, refined my process after each one, and I’ll walk you through the right way to do it.
Before the wallet arrives
The setup starts before the box is in your hands. There are three things to prepare:
Your air-gap plan
Hardware wallets are designed to keep keys offline, but your setup process involves a general-purpose computer. Think about which computer you’ll use. Ideally, it should be a reasonably clean machine — not a heavily used work laptop with dozens of browser extensions and software you didn’t install. I use a dedicated laptop I keep for Bitcoin-related operations, but you don’t need to go that far. At minimum, before setup:
- Close all non-essential applications
- Use a fresh browser profile or private browsing window for any downloads
- Make sure you’re downloading software directly from the manufacturer’s official website, not a third-party link
Your metal backup solution
Order your metal backup before the device arrives so you’re ready. You don’t want to do your seed backup on paper, then wait weeks for a metal plate to arrive, living with the risk of a paper-only backup in the meantime.
Options I’ve used or evaluated: CryptoSteel Capsule (screw-together steel tiles), Cryptotag (titanium letter punch plates), SeedPlate (steel), and a DIY steel plate with a letter punch set from a hardware store. Any stainless steel or titanium solution that lets you permanently mark 24 words is sufficient. The key properties: resistant to fire (ideally 1400°C+), resistant to water, physically durable.
Note: BIP-39 seed words are designed so that the first four letters uniquely identify each word. Many metal backup systems only provide space for four letters per word. This is intentional and acceptable — as long as you use the standard BIP-39 wordlist, four letters is sufficient for recovery.
Private setup space
This sounds obvious but matters: set up your hardware wallet somewhere private. Not in a coffee shop. Not with a camera pointed at your screen or your hands. Draw the blinds. Put your phone in another room if you have a habit of taking photos. The moment your seed phrase exists in the world, its security depends on no one else ever seeing it.
Unboxing checks
When the device arrives, check the following before you do anything else:
Tamper-evident packaging. Hardware wallets ship with tamper-evident seals or holographic stickers. Examine these carefully. If they look disturbed, if the seal appears to have been removed and reapplied, or if the packaging shows signs of opening, contact the manufacturer before proceeding. Do not set up a device that may have been tampered with in transit.
Verify the SKU against what you ordered. Check the model number on the box against what the manufacturer’s website says your order should contain. Hardware wallet vendors publish the exact packaging specifications. A device that came with different accessories or documentation than specified is worth investigating.
The device should be blank. A legitimate hardware wallet arriving from the manufacturer should contain no pre-loaded seed phrase, no pre-generated keys, no partial setup. If a hardware wallet arrives with a “pre-configured” seed phrase included — perhaps on a card inside the box — this is a scam. Return it immediately. Seed phrases are generated on the device during setup; they are never provided by the manufacturer.
This scam has been documented: attackers sell compromised hardware wallets with “pre-installed” seed phrases, hoping buyers will fund the wallet before generating their own seed. The attacker already has the keys and drains the wallet once it’s funded.
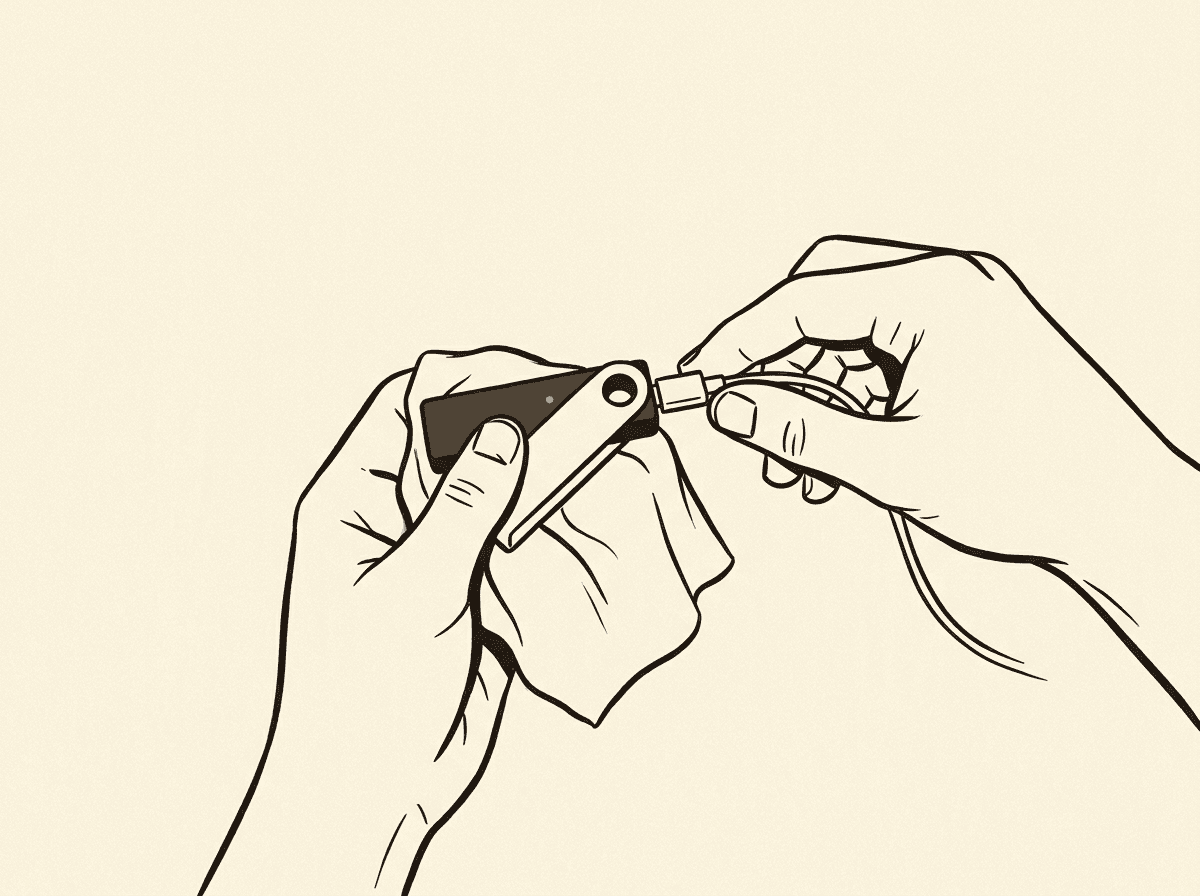
Firmware verification
Before you initialize the device, update the firmware to the latest version via the official manufacturer application.
Why? Firmware updates often include security fixes. Running outdated firmware means running known vulnerabilities. The firmware update process is also an opportunity to verify you’re running legitimate software — manufacturer apps typically verify firmware cryptographic signatures before flashing.
The process varies by device:
- Ledger: Use Ledger Live; it detects the connected device and prompts for firmware update
- Trezor: Use Trezor Suite; update prompt appears when device is connected
- Coldcard: Download firmware from coldcard.com, verify the SHA-256 hash against the published hash on the website before putting it on the device
- BitBox02: Use BitBoxApp; handles firmware verification automatically
- Jade: Use Jade companion app or Blockstream Green; verifies signature before update
For Coldcard users specifically: you can verify the firmware file’s hash before it ever touches the device, using sha256sum on Linux/macOS or Get-FileHash on Windows. Compare against the hash published on coldcard.com. I do this every time. It takes two minutes and is the “don’t trust, verify” principle applied directly.
After the firmware update, the device may require re-initialization. That’s expected.
Seed generation: on the device only
This is the most important step in the entire process. Your seed phrase must be generated on the hardware wallet device, not on any computer.
Here’s why: if your seed phrase is generated on a general-purpose computer — whether by software that then transfers it to the device, or by a website, or by any application running on a connected machine — then the seed phrase existed on that computer. Any software running on that computer could potentially have observed it. Your keys are only as secure as the computer they were created on, which is to say, not very secure.
Hardware wallets solve this by generating entropy internally using their own hardware random number generator. The seed phrase appears only on the device’s screen during setup, and you write it down. It never touches your computer.
There is no legitimate reason for a hardware wallet setup process to require you to type a seed phrase into a computer during initialization. If you encounter a step that asks you to type your seed words into your laptop, stop and investigate — something is wrong with either the device or the software you’re using.
The seed generation process on most devices works like this: the device prompts you to write down words displayed one at a time or a few at a time on the device’s own screen. Take your time. Write each word clearly. After you’ve written all words, the device typically asks you to confirm a subset of them by entering them back via the device’s own buttons or touchscreen (not your computer). This confirmation is part of the initialization — complete it.
The 12- or 24-word write-down
During seed generation, you’ll see your words displayed on the device screen. This is the most critical moment of the entire process.
Pen and paper, right now. Use a pen or sharp pencil. Write legibly — your future self needs to read this under potentially stressful circumstances. Number the words. Check each word against the screen before moving to the next.
Paper copy first, then metal. I write the paper copy at the moment of generation because that’s when I’m focused and the words are in front of me. I transfer to metal immediately afterward, in the same session, before I do anything else.
Make two copies. Two identical written records of the seed phrase. They will live in different locations. Paper copy at home. Metal copy offsite or in a safe.
Never photograph your seed phrase. Not even as a temporary step. Not to “back it up to the cloud quickly.” A photo of your seed phrase is your seed phrase, stored in every place that photo has ever been: your phone, your photo backup service, your cloud sync. This is a complete bypass of the security properties you just spent money to establish.
Never type your seed phrase into any computer, ever, for any reason. Legitimate recovery processes happen through the hardware wallet device, not through your general-purpose computer. If software asks you to type your seed phrase into a computer-based interface, that software is either compromised or is a phishing attempt.
A word on passphrase encryption (the “25th word”)
Most hardware wallets support an optional passphrase that is added to the seed phrase to derive a completely separate wallet. This is sometimes called the “25th word” (for a 24-word seed) — though it can be any string, not just a word.
I cover this in more detail in the passphrase section below, but I mention it here because some people decide during initial setup whether to use a passphrase. My recommendation for first-time users: don’t use a passphrase until you understand the recovery process deeply. The regular seed phrase recovery is already something you can get wrong. Adding a passphrase adds another thing to back up and another way to permanently lose access.
Verify your backup before funding
After you’ve written down your seed phrase and completed the setup, verify that your backup is correct before you put any bitcoin on the wallet.
Method 1 (preferred if device supports it): Use the device’s built-in seed verification feature. Coldcard, newer Trezor devices, and some others allow you to enter your seed phrase back into the device to verify it matches without performing a full wipe. Check your device’s documentation.
Method 2 (universal): Wipe the device to factory settings and perform a full recovery from your written seed phrase. Confirm that the first receiving address after recovery is identical to the address you had before the wipe.
To check the address: before wiping, write down (or take note of) the first receiving address your device shows. After recovering from seed, navigate back to the same receiving address and verify it matches character for character.
I check the first 8 characters and last 6 characters minimum. If they match, I’ve confirmed the seed backup was written correctly.
This test should take 15–30 minutes. Never fund a wallet whose backup you haven’t verified by successful recovery.
First send from exchange: a test transaction
Now you have a verified, funded — well, almost funded — hardware wallet. Before you send your real holdings, do a test transaction.
Send a small amount from your exchange to the hardware wallet’s first receiving address. I typically send an amount equivalent to a few dollars. Wait for it to confirm on-chain. Verify it appears in your wallet.
This accomplishes several things:
- Confirms you correctly copied the receiving address (not a modified address by malware)
- Confirms your wallet software is communicating correctly with the hardware device
- Confirms you understand the withdrawal process on your exchange
Only after the test transaction confirms successfully do I send the main transfer.
Before copying any address into an exchange withdrawal form, use the Address Validator on this site to verify the address is a valid Bitcoin address. This catches typos and format errors before you commit to a transaction.
Verify the address on the device
When your wallet software displays a receiving address, always verify it on the hardware device’s own screen before using it. The steps:
- In your wallet software (Ledger Live, Trezor Suite, Sparrow, etc.), navigate to “Receive” and request a new address
- The software should prompt you to verify the address on the hardware device
- The hardware device displays the address on its own screen
- Verify that the address shown on the device matches what the software showed
If the addresses don’t match, stop. Malware on your computer could be substituting addresses — this is a documented attack vector. The address on the hardware device screen is authoritative.
This verification step applies every time you generate a new receiving address.
Passphrase: the “25th word”
The BIP-39 passphrase feature — often called the “25th word” — allows you to add an arbitrary string to your seed phrase to derive a completely separate HD wallet. Different passphrase = different set of addresses = different bitcoin balance.
Why use one? A passphrase creates what’s sometimes called a “plausible deniability” wallet. If someone obtains your seed phrase, they see only the wallet derived from the seed alone (which you can keep empty or with a small decoy balance). Your real funds are in the wallet derived from seed + passphrase, which they don’t have.
This is a powerful security enhancement. It’s also a way to permanently and irrecoverably lose all your bitcoin if you forget the passphrase or make a typo you don’t catch.
Key properties of the passphrase:
- Case-sensitive; spaces are significant
- There is no “wrong” passphrase — any passphrase produces a valid wallet; there’s no error if you type it incorrectly
- If you change even one character, you get a completely different wallet
- The hardware wallet does not store the passphrase; you must enter it each time you access the wallet
My strong recommendation: if you decide to use a passphrase, write it down and store it with the same physical security as your seed phrase, but at a different location from the seed. The seed plus passphrase together control your funds; either alone is insufficient for recovery.
I did not use a passphrase on my first hardware wallet. I added one later after I understood the recovery process deeply and had done multiple test recoveries. If you’re setting up your first wallet, keep it simple.
My setup mistakes — so you don’t repeat them
Here is the honest list of what I did wrong on my first setup:
Mistake 1: Paper-only backup stored in one location. For six months my seed phrase existed only on one piece of paper in my house. Fire, flood, burglary — any of these would have been total loss. Now I use metal backup and geographic separation.
Mistake 2: Not verifying firmware before use. I plugged in the device and started setup without checking the firmware version or updating to the latest. I got lucky that no security fixes had been released for my specific device since manufacture. Verify and update firmware before generating your seed.
Mistake 3: Rushing the seed write-down. I wrote in a hurry in dim light. I later found two words were legible but one had an ambiguous letter. I had to compare against the full BIP-39 wordlist to determine which word I’d meant. Take your time. Good lighting. Block letters. Review each word before moving on.
Mistake 4: Not verifying the backup before funding. I funded the wallet before confirming my backup was correct. I got lucky — the backup was correct. But it was a completely preventable risk. Always verify recovery from backup before putting real money on any wallet.
Mistake 5: Using my regular laptop without precautions. I installed the wallet’s companion app on my daily-use laptop with dozens of browser extensions and software I didn’t carefully track. The attack surface was unnecessarily large. Consider using a dedicated machine or at minimum a fresh browser profile for Bitcoin-related operations.
Mistake 6: Glossing over the address verification step. On my first few receives, I was lazy about verifying the address on the device screen. I got away with it. On a device that might have been compromised — which I couldn’t be certain mine wasn’t — this could have redirected my funds. Always verify on the device.
Checklist
Use this before you consider your setup complete:
- Device arrived with intact tamper-evident packaging
- Device had no pre-loaded seed phrase
- Firmware updated to latest version via official software before generating seed
- Seed phrase generated on the device, never on a computer
- 24 words written legibly on paper, numbered, verified against device screen
- Metal backup created as a second copy, also numbered and verified
- Paper backup and metal backup stored in different physical locations
- Seed phrase backup verified by successful recovery (either via device’s verification feature or full wipe + restore test)
- First receiving address verified on the device’s own screen before use
- Test transaction completed and confirmed before moving significant amounts
- Address validated using address validator before submitting withdrawal from exchange
- No photos of seed phrase; no digital copy of seed phrase anywhere
Related tools
- Address Validator — verify any Bitcoin address before sending; catches format errors and typos that would mean permanent loss
Further reading
- BIP-39 Specification — the standard defining seed phrase generation, the wordlist, and derivation
- Mastering Bitcoin — Antonopoulos; chapters on keys and wallets explain the cryptographic foundation behind hardware wallets
- Sparrow Wallet — my recommended desktop wallet for interacting with hardware devices; excellent documentation on hardware wallet integration and address verification
- bitcoin.org — Securing Your Wallet — brief official guidance on wallet security practices
- Coldcard Documentation — even if you don’t use a Coldcard, this documentation is among the most thorough explanations of hardware wallet security practices available